The logging software N1MM has introduced a feature to use Piper-TTS to generate audio which can be routed to the transceiver. This is a great option to save your voice, or keep the noise down in your household during the long nights of contesting when each QSO delivers extra night-time points.
Default you can download and use all the standard voices. This is the easiest option obviously. But for those wanting to use a personal touch, you can use Piper-TTS to create your own voice-files and use them instead. Pretty neat.
It has been a lot of trial and error to get the training doen and create my own voice-files. With this guide I will try to describe how I did this.
System choice
While trailling, I have switched between Windows 11 and Linux Ubuntu 25. The current sites which describe the training-process for hams, use a Docker-container which you have to upload to server, which does all the hard labour in exchange for a few dollars, or via WSL. The whole process can be done offline, native, without installing WSL or Docker. It can be done CPU only, but having an Nvidia-card to support the training, will drastically improve the speed. I have an older Geforce 1060 with 6GB memory, which with the current 1.3.0 version of Piper and CUDA 12.8 still works.
I have discovered that when running the training, Ubuntu was faster, but this guide is for Windows native use, since that is the system most used. Piper training can be run in a Windows virtual Linux environment (WSL), but a disadvantage I found, is that it can’t use CUDA.
Software requirements
In this guide I chose a mix of scripts and command-line typing (or rather, copy and paste the code). One could put the whole installation process in a script, but I think it’s better to keep an eye on the various installation steps for potential errors. For the processing, with the help of AI, I generated a couple of scripts to ease the job at hand. They are all available on my Github-page, but the code is also on the webpage to copy and paste in a text-editor.
There is always a small chance something will go wrong due to incompatible software (usually). I try to give help, and if you ran into something and found a solution, I will add this to the webpages. If you like a troublesome method, it’s best to look at Kari’s, OH2XX solution, as this is a kind-of plug & play solution where all software matches, and you only need to provide your recordings, and credit-card details to buy time and space at Runpod.
First thing is to install the Python environment from the Python website. Download the installer for version 3.13 (due to package compatibility) and follow the instructions. Make sure you tick the “Add Python to System Path” box. Once this is completed, we need to pull two programs from the net. One to record, the other to process the audio and make our voice-file. The downloads will be done with the command git from a command window.
Note: from here on all installation-commands and scripts should be entered into, and run from the Powershell commandline-window.
First, create a root-directory to hold your files. I called mine pipern1mm. In the Windows Explorer, open the folder and right-click in the folder and select Open in Terminal to open a Powershell window. If you don’t have Powershell installed, folow the instructions from Installing PowerShell on Windows.
To be able to download the programs, we need to install a program called Git. Do this by entering
winget install Microsoft.Gitin the terminal window. Git will now be installed, or upgraded if you have an older version.. Now we can install the required programs by downloading them with Git to our directory.
git clone https://github.com/rhasspy/piper-recording-studio.git
git clone https://github.com/OHF-voice/piper1-gpl.git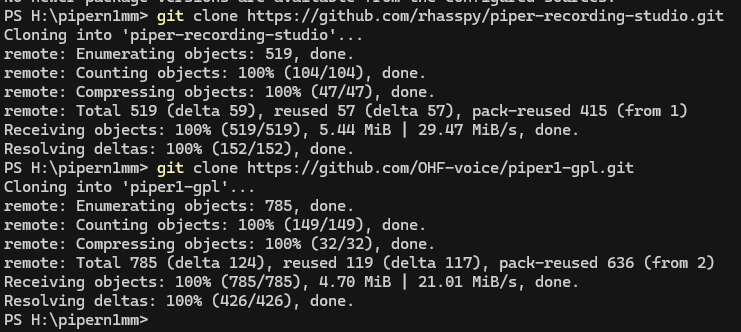
After installation , it’s time to build the programs. Both are installed in a virtual Python environment. This keeps everything seperate and whenyou remove them, you won’t accidently remove things which your system still needs. Further, I use relative directories, not the full name. A single . means the current directory, and two dots .. means/refers to, one directory up in the chain.
To begin, download the scripts which will be used later on in the process.
git clone https://github.com/taekehf/pipertts-for-n1mm-helpfiles.gitFor Piper Recording Studio, follow the instructions on the Github-page (installing without docker).
cd piper-recording-studio
python -m venv .venv
.\.venv\scripts\activate.ps1
Your prompt should now have (.venv) in front which means you are now in the virtual environment. Let’s run an upgrade of exisiting modules and install the program
python -m pip install --upgrade pip
python -m pip install -r requirements.txt
deactivate
When all was succesfull we leave the virtual environment with the deactivate-command, so there should be no more (.venv) in front of the prompt.
Then install Piper-tts via the instructions on the Github-page. First we create it’s virtual environment.
cd ..\piper1-gpl
python -m venv .venv
.\.venv\scripts\activate.ps1
Your prompt should now have (.venv) in front which means you are now in the virtual environment.
python -m pip install -e .[dev]
python setup.py build_ext --inplace
Test if Piper is working
python -m piper --helpThen build the wheels
python -m buildSince we’re in the Piper virtual environment, let’s install the training as well.
python -m pip install -e .[train]The next step is to build the cython extension. For this you need to run a shell-script, but Powershell doesn’t understand this. I have converted the script with Chat GPT to a batch-file which Powershell understands. Move the script from the Github download, or open a text-editor, copy the following code and save the file as build_monotonic_align.bat in the piper1-gpl folder (I used the same name, so I know what it is about).
@echo off
setlocal enabledelayedexpansion

:: Get the directory of the current script
set "this_dir=%~dp0"
:: Remove trailing backslash if present
if "%this_dir:~-1%"=="\" set "this_dir=%this_dir:~0,-1%"

:: Activate virtual environment if it exists
if exist "%this_dir%.venv" (
call "%this_dir%.venv\Scripts\activate.bat"
)

:: Change to source directory
cd /d "%this_dir%\src\piper\train\vits\monotonic_align"

:: Create target directory
mkdir monotonic_align 2>nul

:: Delete old compiled C file
del /f /q core.c >nul 2>&1

:: Run cythonize
cythonize -i core.pyx

:: Move compiled .pyd (Windows version of .so) to monotonic_align
for %%f in (core*.pyd) do (
move /Y "%%f" "monotonic_align\"
)

endlocal
Next run the script from the Powershell window
.\build_monotonic_align.batAnd finally creating the dev build
python setup.py build_ext --inplaceAnd leave the virtual environment again with the deactivate command.
Finish by creating the cache-directory and dataset-directory with it’s two subdirectories, and the endresult should look like
- cache
- dataset
- dataset\wav
- dataset\ckpt
- piper-recording-studio
- piper1-gpl
Potential errors and solutions
It is possible you have installed a Python-version which isn’t compatible with some PIP-packages, so you usually need to step back a version if you can’t find an update of the conflicting PIP-package (usually you should get the latest version if you start the installation). The installation will abort and give you a “no compatible version found”. Take note of the module and go to the Python Package Index website.
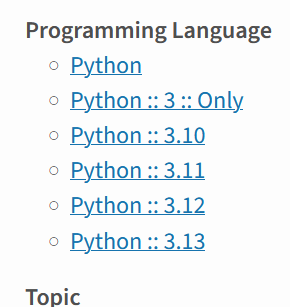
E.g. if you installed the latest Python v.3.14 you could currently get an error that there was no compatible version of ONNXRUNTIME. If you search for that package on the index, you would see (see image below) that it isn’t compatible with Python 3.14, but is with 3.13. So in this case you need to uninstall v3.14 and install v3.13.
To update a PIP package, you can try the command pip install -U package_name where package_name is the package where the installation breaks. E.g. pip install -U onnxruntime.